The microscope in cell studies
· Light microscopes are used to view cells and cellular material prepared on microscope slides.
· You must be able to make temporary preparations suitable for viewing, e.g. thin specimens mounted on a slide with a coverslip.
· A good preparation should be thin, flat, well illuminated and have enough contrast to distinguish cell structures.
· Stains may be used to increase contrast so structures are easier to see.
· Start viewing using the lowest-power objective lens, then increase magnification once the specimen is focused.
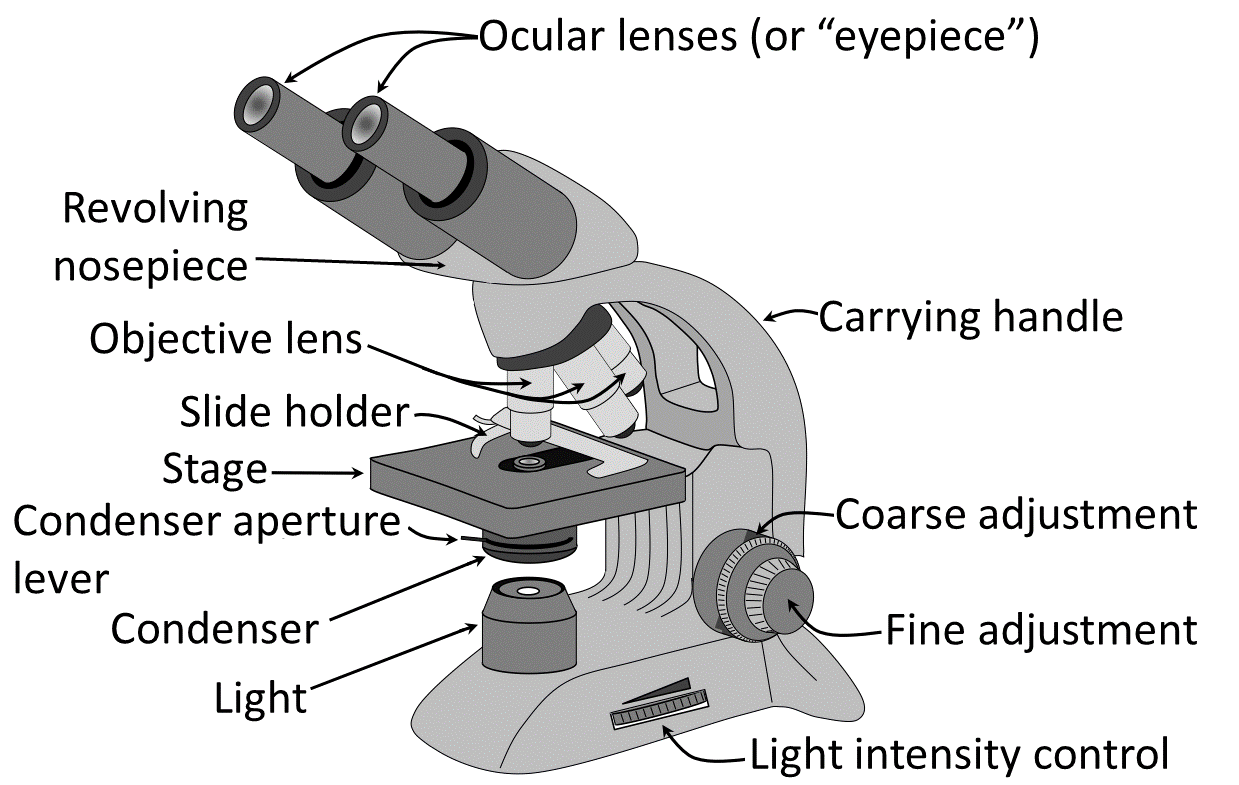
This diagram shows the main parts of a light microscope used when preparing and viewing cells. The eyepiece and objective lenses provide magnification, while the stage holds the slide. The condenser/light source and focus knobs help produce a clear image. Source
Drawing cells from slides and micrographs
· Draw only what is actually visible, not an idealised textbook cell.
· Use clear, single, unbroken pencil lines; avoid sketchy or shaded drawings.
· Include a title, labels and either magnification or a scale bar if provided.
· Label lines should be straight, usually drawn with a ruler, and should not cross.
· In exams, drawings may be required from microscope slides, photomicrographs or electron micrographs.
· For plan diagrams, show tissue layout without drawing individual cell contents unless asked.
· For high-power drawings, show the shape and visible structures of a few cells accurately.
Magnification calculations
· Magnification = how many times larger the image is than the actual specimen.
· Key equation: magnification = image size ÷ actual size.
· Rearrangements: actual size = image size ÷ magnification; image size = actual size × magnification.
· Always convert image size and actual size into the same units before calculating.
· Magnification has no unit; it is written as ×100, ×400, ×1500, etc.
· Common conversions: 1 mm = 1000 µm; 1 µm = 1000 nm.
· Measure printed images with a ruler in mm, then convert if the answer must be in µm or nm.
· For micrographs with a scale bar: magnification = measured scale bar length ÷ actual scale bar length.
· For actual size: actual size = measured image length ÷ magnification.
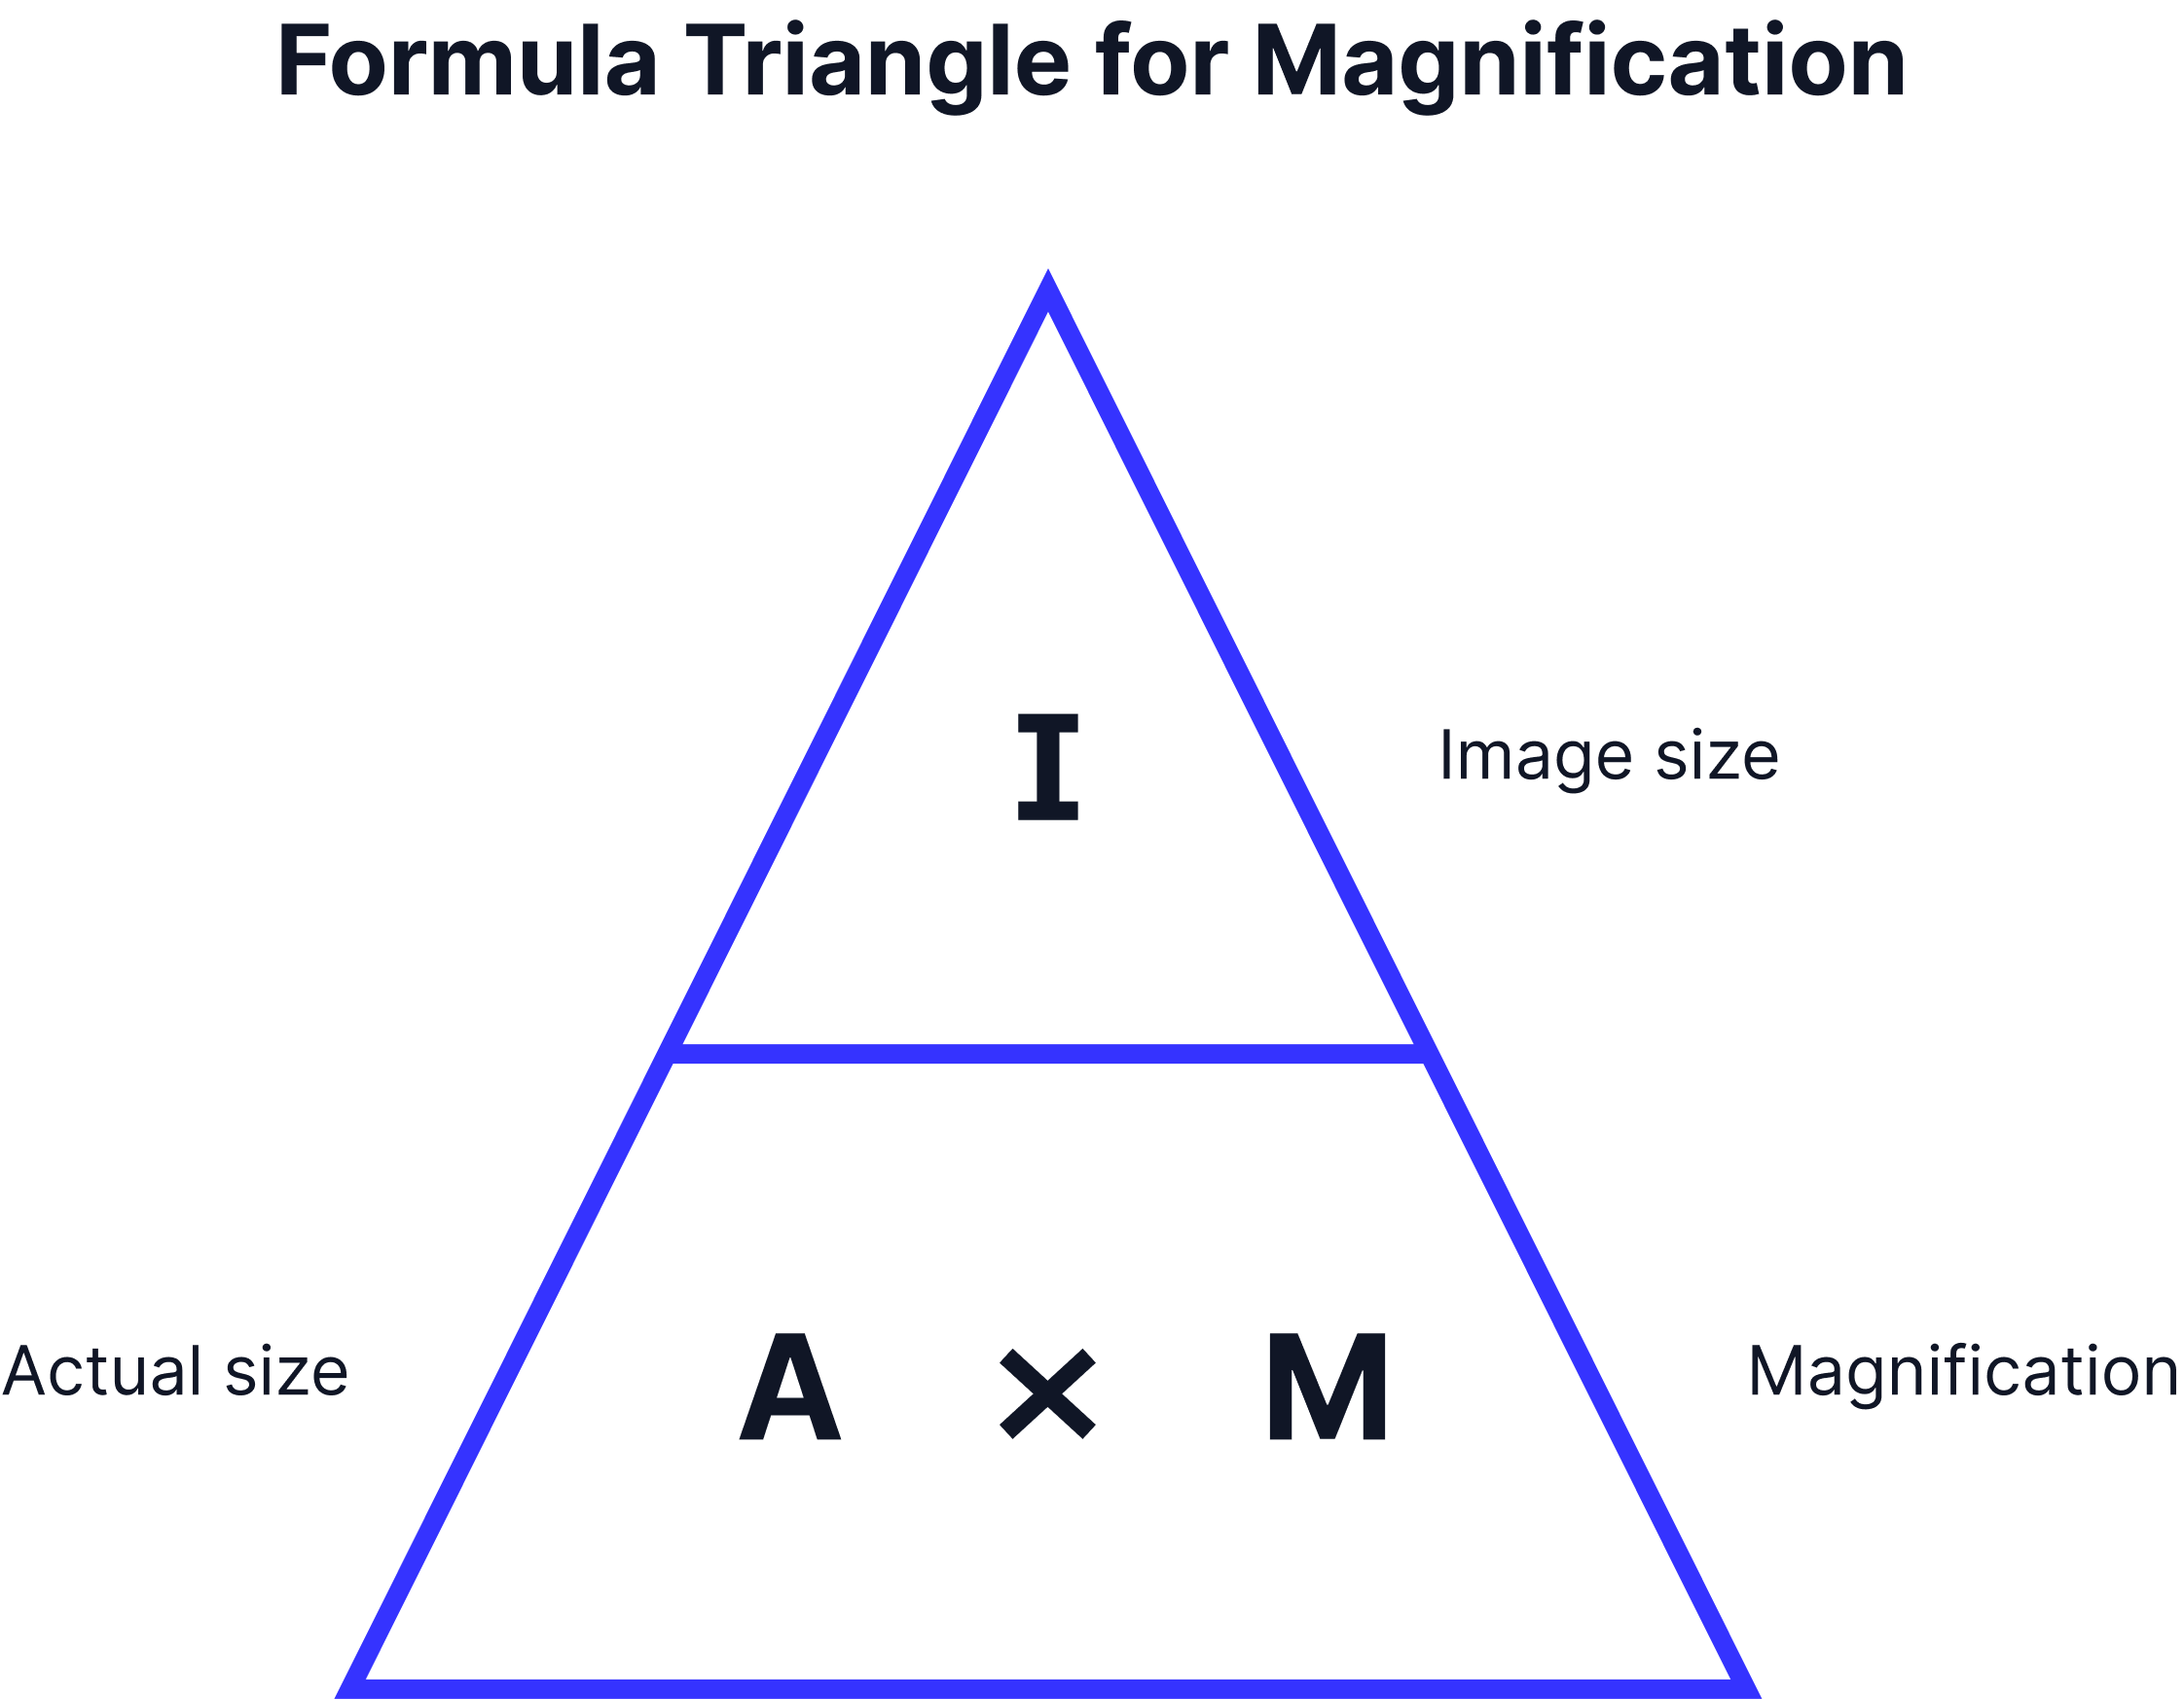
This image summarises the magnification equation used in microscopy calculations. It helps students rearrange between image size, actual size and magnification. The key exam skill is converting all measurements into the same unit before using the equation. Source
Eyepiece graticule and stage micrometer
· An eyepiece graticule is a scale in the eyepiece with arbitrary divisions.
· A stage micrometer is a microscope slide with a scale of known length.
· The eyepiece graticule must be calibrated using the stage micrometer before measuring specimens.
· Calibration must be repeated when the objective lens/magnification changes.
· To calibrate: align the eyepiece graticule scale with the stage micrometer scale.
· Work out how many eyepiece graticule divisions equal a known length on the stage micrometer.
· Then calculate the value of one eyepiece graticule division at that magnification.
· Use calibrated eyepiece divisions to measure the actual size of cells or organelles.
· Use appropriate units: mm, µm or nm.
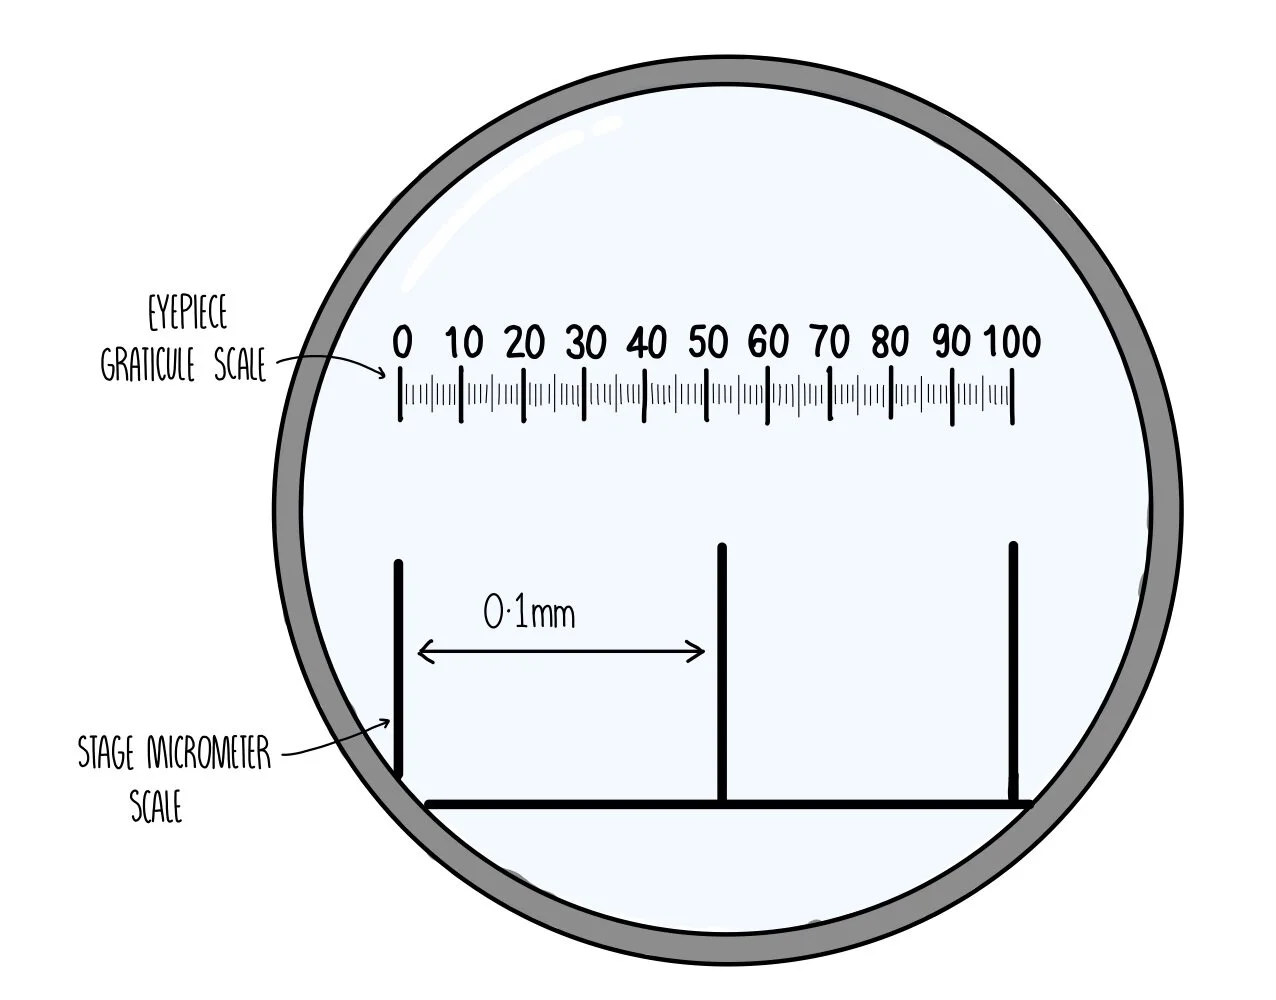
This diagram shows how a graticule scale is compared with a stage micrometer scale. The stage micrometer provides a real measurement, allowing each eyepiece division to be converted into micrometres. This is essential for measuring cells accurately under the microscope. Source
Resolution and magnification
· Resolution = the ability to distinguish two close points as separate.
· Magnification = how many times larger an image is than the actual object.
· High magnification without good resolution gives a bigger but blurry image.
· Resolution determines the amount of detail visible in an image.
· A light microscope uses visible light and has lower resolution than an electron microscope.
· An electron microscope uses electrons, which allow much higher resolution.
· Transmission electron microscopes (TEMs) show internal cell detail in thin sections.
· Scanning electron microscopes (SEMs) show surface detail and produce 3D-like images.
· Electron micrographs may be from TEM or SEM, and you may need to calculate magnification or actual size from them.
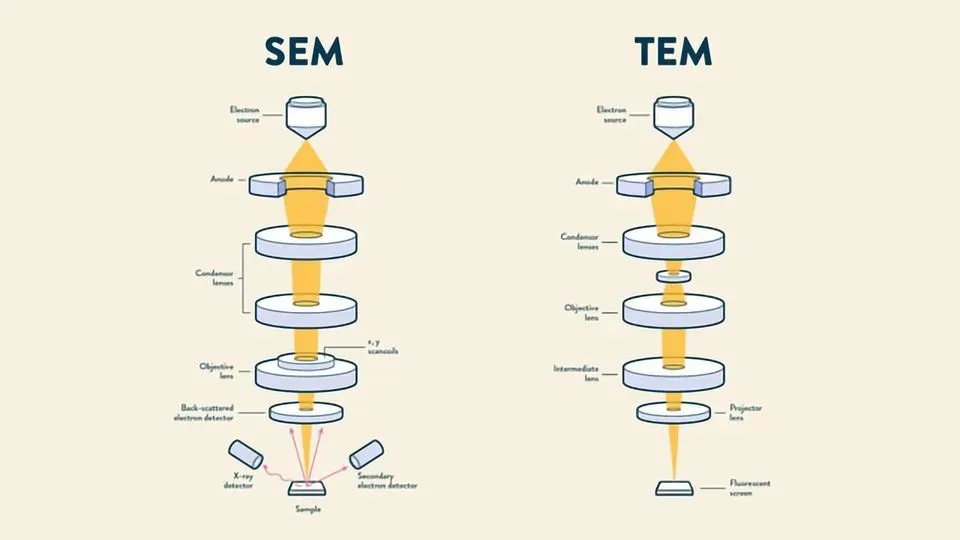
This comparison shows that TEM and SEM use electron beams differently. TEM passes electrons through a thin specimen to show internal structures, while SEM scans the surface to show external detail. This explains why electron microscopy gives higher-resolution information than light microscopy. Source
Photomicrographs and electron micrographs
· A photomicrograph is a photograph taken using a light microscope.
· An electron micrograph is an image produced using an electron microscope.
· You must be able to interpret images from light microscopy, TEM and SEM.
· Use scale bars, magnification values and unit conversions to calculate actual sizes.
· Check whether the image shows whole cells, cell surfaces or internal ultrastructure.
· In exam questions, identify what is visible and avoid naming structures that cannot be resolved.
Temporary slide preparation
· Use a thin sample so light can pass through it clearly.
· Place the sample on a clean microscope slide.
· Add a drop of water or suitable mounting fluid.
· Add a stain if needed to increase contrast.
· Lower the coverslip carefully at an angle to avoid trapping air bubbles.
· Place the slide on the stage and secure it using clips.
· Focus first using low power, then move to higher power if required.
· Use the fine focus at high magnification to avoid damaging the slide or lens.
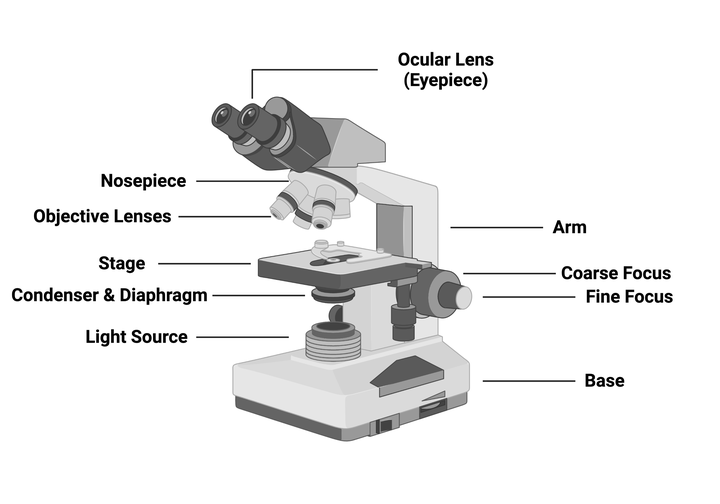
This image links microscope structure to practical use. The stage supports the slide, the objective and ocular lenses magnify the specimen, and the light path passes through the sample. Understanding these parts helps students follow correct focusing and viewing technique. Source
Checklist: can you do this?
· Make a temporary slide preparation suitable for viewing with a light microscope.
· Draw cells accurately from slides, photomicrographs and electron micrographs.
· Calculate magnification, actual size and image size using correct unit conversions.
· Use an eyepiece graticule and stage micrometer to measure specimens.
· Explain the difference between resolution and magnification, comparing light and electron microscopy.