
OCR Specification focus:
‘the course and outcome of the Battle of Hastings; reasons for William’s victory (leadership skills, strategy, tactics, resources, logistics, chance); William’s march through the south; William’s coronation’
The Battle of Hastings in 1066 determined England’s ruler, pitting Harold Godwinson against William of Normandy in a decisive clash shaped by leadership, strategy, and fortune.
The Course of the Battle
The Battle of Hastings took place on 14 October 1066 near Hastings in Sussex. Harold’s forces had just marched from Stamford Bridge after defeating Harald Hardrada, covering roughly 250 miles in less than two weeks.
Initial Positions
Harold Godwinson positioned his Anglo-Saxon army on Senlac Hill, a strong defensive location.
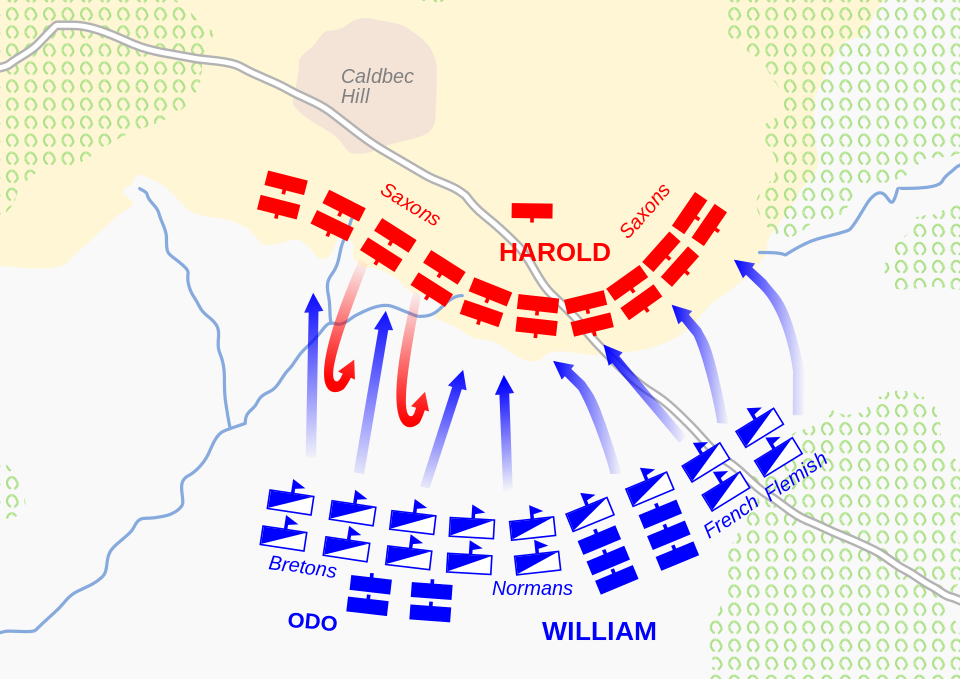
A labelled diagram showing the initial positions at Hastings on 14 October 1066. The English hold the ridge in a compact shield wall; Norman archers, infantry and cavalry deploy below. Clear unit labels make the contrasting force structures immediately visible. Source
His force included housecarls (professional soldiers armed with axes) and fyrd (levied troops).
William of Normandy arranged his army at the base of the hill, with infantry at the front, archers on the flanks, and cavalry behind.
Early Engagement
The battle began with a Norman archery barrage aimed to weaken the shield wall.
The Anglo-Saxon shield wall — a defensive formation of overlapping shields — resisted initial assaults.
Shield Wall: A defensive formation where soldiers stood close together with overlapping shields, used to block attacks and absorb enemy charges.
Mid-Battle Developments
Norman infantry assaults failed to break Harold’s line.
At one point, a feigned retreat by Norman forces lured fyrd troops down the hill, breaking parts of the shield wall.
William’s cavalry exploited the gaps, engaging the less-disciplined English levies.
Turning Point and Harold’s Death
The repeated attacks by cavalry and archers gradually thinned the Anglo-Saxon ranks.
Harold was reportedly struck in the eye by an arrow (accounts vary) and killed, along with his brothers Gyrth and Leofwine.
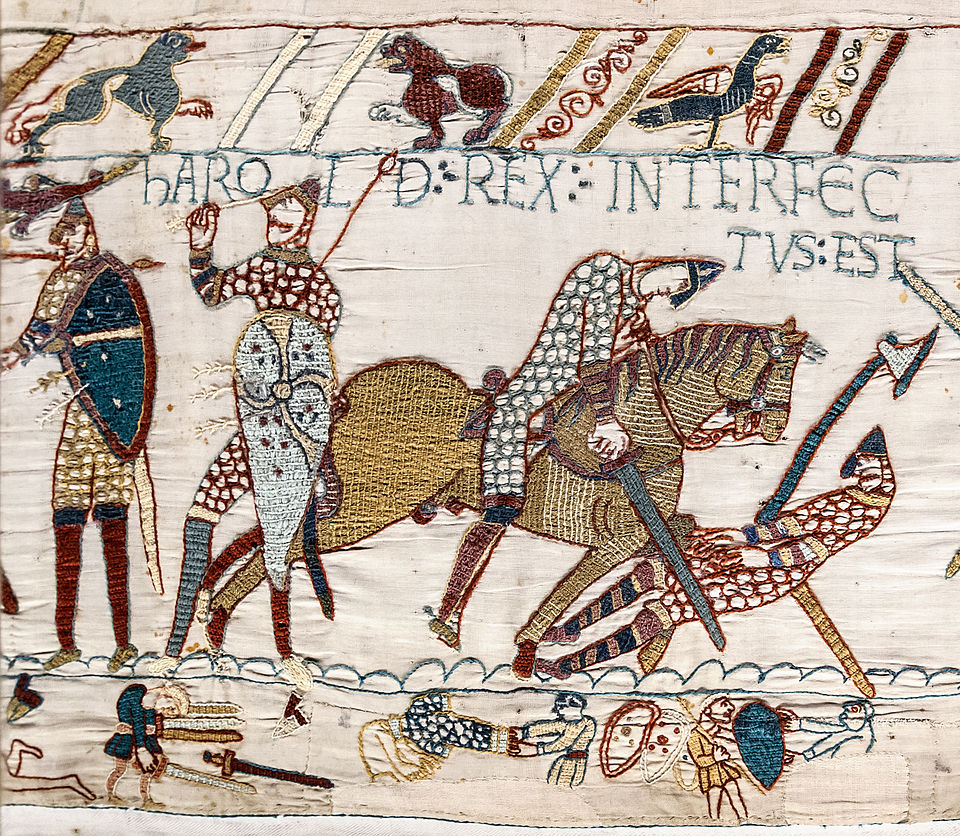
Bayeux Tapestry, Scene 57, depicting King Harold’s death at Hastings. The inscription identifies Harold’s slaying; whether an arrow-to-the-eye is original is debated by historians, but the scene unequivocally signals the English defeat. Source
With the king dead, English resistance collapsed, leading to a Norman victory.
Outcome of the Battle
The battle ended with Norman control of the field and the destruction of much of Harold’s army. William secured a decisive victory, but the conquest was not complete — resistance continued in other regions.
Immediate Effects
Harold’s death left no clear, strong leader for the Anglo-Saxon resistance.
William began consolidating control in the south, securing Dover, Canterbury, and Winchester.
On 25 December 1066, William was crowned King of England at Westminster Abbey.
Reasons for William’s Victory
Leadership Skills
William demonstrated personal resilience — when rumours spread of his death during the battle, he lifted his helmet to show he was alive, rallying his men.
His willingness to adapt tactics, such as the feigned retreat, showed flexibility.
Strategy and Tactics
Combined-arms tactics used archers, infantry, and cavalry in coordination, contrasting with Harold’s primarily infantry-based army.
Feigned retreats disrupted the Anglo-Saxon formation, breaking their defensive strength.
Positioning archers to fire in arcs later in the battle allowed them to bypass shields.
Resources and Logistics
William’s army was well-supplied, having prepared for months and brought reinforcements from Normandy and beyond.
The Norman cavalry provided mobility and shock power, unmatched by the English army.
Cavalry: Soldiers mounted on horseback, used for speed, manoeuvrability, and shock attacks in battle.
Chance
The timing of Harold’s battles was critical: his forces had just fought at Stamford Bridge, suffering losses and fatigue.
Storms delayed William’s crossing but also prevented Harold from catching him unprepared.
Harold’s Strategic Disadvantages
Rapid march from the north meant Harold could not gather all available forces.
Choosing to engage William immediately rather than wait for reinforcements left his army vulnerable.
William’s March Through the South
Following the battle:
William secured Romney, Dover, and Canterbury, ensuring key ports and towns were under his control.
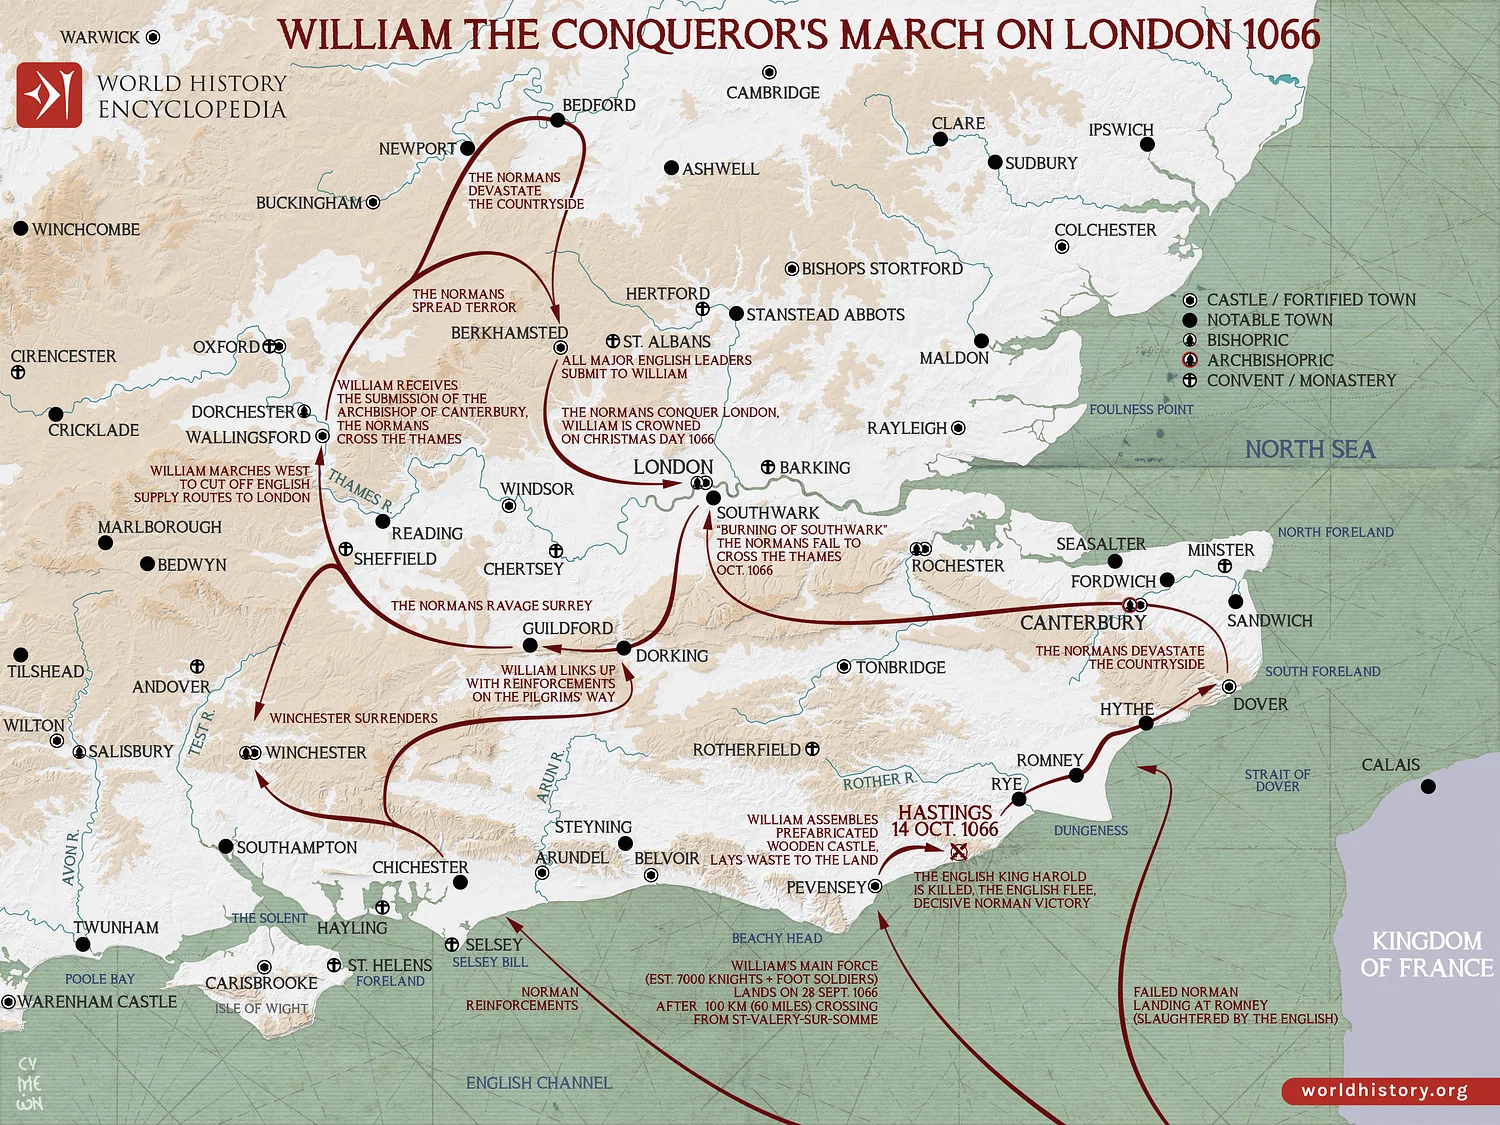
A campaign map of William’s movements in late 1066 from the Sussex coast through Kent toward London. Arrows trace the route and show how William avoided a direct assault, instead isolating the city. Includes extra place names to situate the manoeuvre geographically. Source
He avoided a direct approach to London, instead circling to cut off supply routes and intimidate the city.
This manoeuvre forced London to submit without a prolonged siege.
William’s Coronation
On Christmas Day 1066, William was crowned William I of England.
The coronation solidified his legitimacy, though unrest and rebellions would continue in subsequent years.
It marked the beginning of Norman rule, transforming England’s political and cultural landscape.
Practice Questions
Question 1 (2 marks)
Name two military tactics used by William of Normandy during the Battle of Hastings that helped him to win.
Mark Scheme:
1 mark for each correct tactic, up to a maximum of 2 marks.
Acceptable answers include:
• Feigned retreat (1 mark)
• Combined use of cavalry, infantry, and archers (combined-arms tactics) (1 mark)
• Use of archers to fire in arcs later in the battle (1 mark)
• Repeated cavalry charges to break the shield wall (1 mark)
Question 2 (5 marks)
Explain two reasons why Harold Godwinson was at a disadvantage before the Battle of Hastings.
Mark Scheme:
1 mark for each valid reason identified, plus up to 1 additional mark per reason for explanation, to a maximum of 5 marks.
Acceptable reasons and explanations:
• Harold’s army was weakened and fatigued after marching rapidly from Stamford Bridge (1 mark for reason, 1 mark for explaining that this reduced numbers and morale before facing William).
• Lack of cavalry in Harold’s army (1 mark for reason, 1 mark for explaining that this limited mobility against Norman cavalry).
• Failure to wait for reinforcements before engaging William (1 mark for reason, 1 mark for explaining that this meant fewer troops and less preparation time).
• Losses suffered at Stamford Bridge shortly before Hastings (1 mark for reason, 1 mark for explaining that this meant fewer experienced soldiers).
FAQ
The slope of Senlac Hill meant Norman cavalry charges were slowed on the ascent, giving the Anglo-Saxon shield wall an advantage early on.
However, the surrounding open ground allowed William to manoeuvre his troops for repeated assaults and feigned retreats.
The ridge also had gaps on the flanks, which the Normans exploited once parts of the shield wall broke.
Medieval battles relied on visual and audible signals due to the noise and chaos.
William used trumpets, shouted orders, and banners to direct movements.
The Duke’s own banner, the Papal banner, acted as a rallying point and morale booster.
Poor communication among Anglo-Saxon fyrd troops likely contributed to disorganisation when responding to Norman feigned retreats.
Yes. While the core were Norman, William recruited from across northern France and beyond.
Breton contingents formed part of the left flank.
Flemish troops also joined, motivated by promises of reward.
This mix provided varied fighting styles, from disciplined cavalry to light infantry, increasing tactical flexibility.
The day was clear and dry, which favoured mobility and the use of archery.
Heavy rain or mud would have hindered Norman cavalry and reduced arrow range.
Good visibility allowed William to coordinate complex manoeuvres, such as the feigned retreats, without losing contact with his forces.
Yes. William’s public act of lifting his helmet mid-battle dispelled rumours of his death, preventing panic.
The Papal banner symbolised divine approval, boosting Norman morale.
In contrast, Harold’s death and the visible loss of leaders caused a sharp drop in Anglo-Saxon confidence, accelerating the collapse of resistance.
