
OCR Specification focus:
‘Use laboratory glassware for varied techniques including serial dilutions, and use qualitative reagents to identify biological molecules.’
Laboratory glassware and qualitative reagents allow biologists to measure, mix, dilute and identify substances accurately. Serial dilutions support quantitative investigations and reagent tests reveal key biological molecules.
Laboratory Glassware
In OCR Biology practical work, students must safely and correctly use laboratory glassware to obtain reliable data. The most commonly used items have different levels of precision and are chosen according to the investigation.
Measuring and Handling Liquids
Biologists use measuring cylinders, pipettes, burettes, volumetric flasks and beakers to transfer and measure solutions.
Beakers are used for holding, mixing and roughly measuring liquids; they offer low precision.
Measuring cylinders give more accurate volume readings for general laboratory use.
Volumetric flasks are calibrated for a single volume and are used when preparing solutions of known concentration.
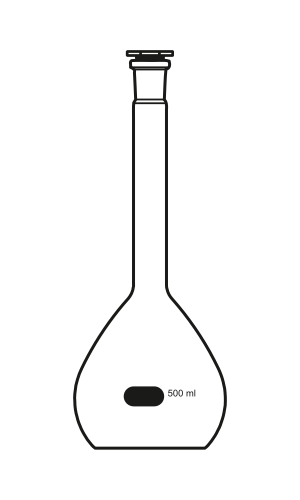
A labelled diagram of a calibrated volumetric flask used to prepare solutions to an exact fixed volume at the calibration line, supporting accurate solution preparation in practical work. Source.
Graduated and volumetric pipettes allow precise transfer of small volumes.
Burettes are used when titrating, enabling controlled addition of a reactant and accurate end-point measurement.
When heating samples, test tubes, boiling tubes and conical flasks are used. Conical flasks reduce loss of liquid through splashing and can be clamped to stands for stability. Glassware must be checked for cracks, cleaned thoroughly, labelled appropriately and rinsed with distilled water to prevent contamination. Accurate measurements rely on reading the bottom of the meniscus at eye level and ensuring equipment is on a level surface.
Good Practice When Using Glassware
Students should work with:
clean, grease-free containers
appropriate personal protective equipment (PPE)
clear labelling of concentrations and hazards
careful mixing, using inversion, stirring rods or magnetic stirrers to ensure homogeneity
Serial Dilutions
Serial dilution is a practical method used to reduce the concentration of a stock solution in consistent steps, producing a measurable range of concentrations for investigations such as enzyme activity or microbial growth.
Serial dilution: A stepwise dilution of a stock solution, usually by a fixed factor, to produce a series of lower concentrations.
Purpose and Principles
Serial dilutions allow measurements to remain within the range of reliable detection. A common dilution factor is 1:10, where one part stock solution is added to nine parts solvent. This provides a systematic concentration series that can be plotted to produce valid data. Between dilution steps, solutions must be mixed thoroughly to ensure even distribution of solute particles.
Serial Dilution Process
Prepare and label a series of test tubes or flasks.
Transfer a measured volume of stock solution into the first container.
Add a fixed volume of distilled water or buffer.
Mix thoroughly before transferring a portion into the next container.
Repeat to generate the dilution series, maintaining aseptic technique where needed.
Correct pipetting technique and consistent dilution factors are vital for reproducibility. Using fresh tips for micropipettes and rinsing glass pipettes between steps avoids cross-contamination.
Qualitative Reagents
OCR Biology requires students to use qualitative reagents to identify biological molecules.

A labelled diagram of the Biuret test showing the purple complex formed when peptide bonds react with copper ions in alkaline solution, demonstrating the colour change used to detect proteins during biochemical testing. Source.
Qualitative reagent: A chemical that produces a visible change, such as a colour shift or precipitate, to indicate the presence of a particular molecule.
Testing for Biological Molecules
Key biochemical tests include:
Benedict’s reagent for reducing sugars, which forms a coloured precipitate when heated with positive samples.
Biuret reagent for proteins, producing a purple colour in the presence of peptide bonds.
Iodine solution for starch, turning blue-black when starch is present.
Ethanol emulsion test for lipids, producing a white emulsion when lipids are present.
These tests must be performed using controlled volumes, clean glassware and appropriate heating equipment where required. Positive and negative controls should be included to validate results.
Ensuring Reliable Colour Interpretation
Students should:
observe against a white background for clarity
compare colour changes with known standards
use consistent lighting conditions
record observations immediately to maintain accuracy
Safe Handling of Reagents
Many reagents contain corrosive, flammable or irritant chemicals. Goggles and gloves are recommended, spills must be cleaned immediately, and waste disposed of in suitable containers. Heating steps should use water baths rather than naked flames where possible to reduce risk.
By combining correct glassware usage, systematic serial dilution, and appropriate qualitative testing, students meet OCR practical expectations and generate reliable biochemical data.
Practice Questions
Question 1 (2 marks)
A student prepares a 1:10 serial dilution from a stock solution. Describe what is meant by a 1:10 serial dilution and state why serial dilutions are used in biological investigations.
Question 1 (2 marks)
1 mark for each of the following points:
A 1:10 serial dilution means one part stock solution is added to nine parts solvent, and the process is repeated stepwise to reduce the concentration each time. (1)
Serial dilutions are used to produce a measurable range of concentrations or to ensure results fall within a detectable range. (1)
Question 2 (5 marks)
A student is testing solutions for the presence of proteins and reducing sugars. Describe the steps and observations required to carry out both the Biuret test and the Benedict’s test. Explain how the student could ensure the results are reliable.
Question 2 (5 marks)
Award up to 5 marks for the following points:
Biuret test: add Biuret reagent (or sodium hydroxide and copper sulfate) to the sample and mix. (1)
Biuret test positive result: colour change from blue to purple indicates protein. (1)
Benedict’s test: add Benedict’s reagent and heat in a water bath. (1)
Benedict’s test positive result: green, yellow, orange, or brick-red precipitate indicates reducing sugars. (1)
To ensure reliability: use controls, repeat the tests, and/or use consistent volumes and conditions such as temperature. (1)
FAQ
To minimise error, ensure the meniscus is read at eye level and always measure using the calibration mark on volumetric equipment. Use clean, grease-free glassware to prevent droplets clinging to surfaces.
Rinse pipettes and burettes with the solution they will contain, and avoid parallax error by keeping equipment vertical. When dispensing liquids, allow time for the final drop to leave the pipette or burette without blowing out residual liquid unless it is designed for that purpose.
Incomplete mixing leads to uneven solute distribution, producing inaccurate concentration gradients and unreliable data. Each step must produce a homogenous solution before continuing the series.
Effective mixing can be achieved by:
gently inverting sealed tubes
using vortex mixers
stirring consistently
This ensures concentration decreases by the correct factor at every dilution step.
A positive control shows the expected colour change, confirming that reagents and conditions work. A negative control checks that any colour change is not caused by contamination or impurities.
Controls make it easier to interpret borderline colour shifts, particularly in reagents such as Benedict’s and Biuret solutions, where results can be subjective.
Use a white tile or background to improve contrast. Standardising the volume of sample and reagent, and keeping light conditions consistent, reduces ambiguity.
For a clearer comparison, prepare a colour reference scale using known concentrations. This allows closer estimation of relative concentration even in qualitative tests.
A water bath provides even, controlled heating that reduces the risk of overheating and denaturing molecules, which could distort results.
It also lowers safety risks by avoiding flammable solvents and reducing splashing or bumping that can occur when a test tube is heated directly with a flame.
